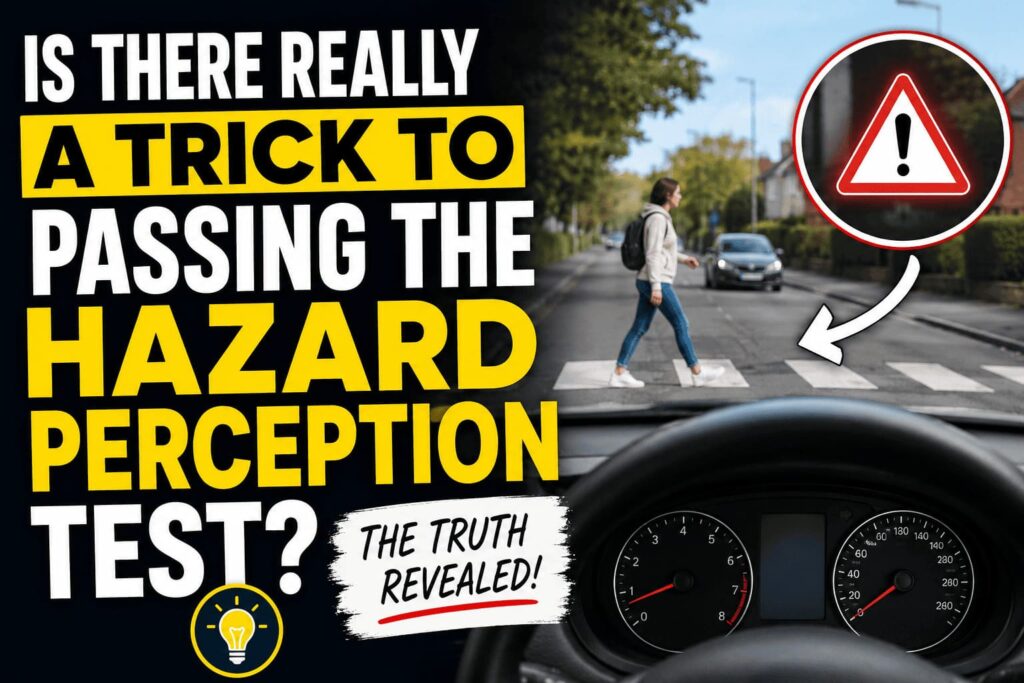
ADI Part 1 Hazard Perception Advice: How to Recognise Hazards and Know When to Click
ADI Part 1 Hazard Perception Advice: How to Recognise Hazards and Know When to Click The hazard perception section of the ADI Part 1 test catches out far more people than you might expect, particularly experienced drivers who assume that years behind the wheel will automatically make this part of the test straightforward.
Integrating ADI Part 1 Hazard Perception Advice: How to Recognise Hazards and Know When to Click into your routine will enhance your safety.
ADI Part 1 Hazard Perception Advice: How to Recognise Hazards and Know When to Click is crucial to succeeding in your driving tests.
The problem is often not that they cannot see hazards; in fact, sometimes the exact opposite is true. They can see what is going to happen so early that they click before the scoring window has started, while other candidates go the other way and click at virtually everything that moves.
After years of training driving instructors, I’ve found that most hazard perception problems come back to one basic misunderstanding: people don’t properly understand the difference between a potential hazard and a developing hazard.
Understanding ADI Part 1 Hazard Perception Advice: How to Recognise Hazards and Know When to Click can make a significant difference in your performance.
Remember, ADI Part 1 Hazard Perception Advice: How to Recognise Hazards and Know When to Click applies throughout your driving career.
In your journey through driving, use ADI Part 1 Hazard Perception Advice: How to Recognise Hazards and Know When to Click to sharpen your skills.
Utilizing ADI Part 1 Hazard Perception Advice: How to Recognise Hazards and Know When to Click can help avoid dangerous situations.
By applying ADI Part 1 Hazard Perception Advice: How to Recognise Hazards and Know When to Click, you’ll improve your reaction times.
Mastering ADI Part 1 Hazard Perception Advice: How to Recognise Hazards and Know When to Click is essential for every driver.
With ADI Part 1 Hazard Perception Advice: How to Recognise Hazards and Know When to Click, you’ll become a safer driver.
Every learner should embrace ADI Part 1 Hazard Perception Advice: How to Recognise Hazards and Know When to Click for optimal results.
Once you understand that difference, learn when to click and use the three-click method sensibly, hazard perception becomes much easier to understand. More importantly, you start developing a skill that you are going to need throughout ADI Part 2, ADI Part 3 and your eventual career as a driving instructor.
ADI Part 1 Hazard Perception Advice: How to Recognise Hazards and Know When to Click What Is a Potential Hazard?
A potential hazard is simply something that could cause you to change speed or direction, but at the moment it isn’t actually doing so.
Imagine you’re driving along and you see somebody walking along the pavement. Could they step into the road? Of course they could, so you should be aware of them and keep an eye on what they’re doing.
That doesn’t automatically make them a developing hazard though.
This is where people often start clicking far too early and far too often. They see somebody on the pavement and click, somebody standing in a garden and click, a vehicle at a junction and click; before long they’re effectively clicking at everything in the scene rather than identifying the hazards that are actually developing.
One of the simplest questions we use with trainees is:
ADI Part 1 Hazard Perception Advice: How to Recognise Hazards and Know When to Click If you were driving the car now, would you brake or swerve?
If somebody is simply walking along the pavement, would you suddenly hit the brakes?
Would you swerve around them?
Again, no.
So at that moment there is no reason to treat them as a developing hazard.
You should certainly be aware of them, because good hazard perception is about anticipating what might happen, but awareness of a potential hazard and responding to a developing hazard are two different things.
ADI Part 1 Hazard Perception Advice: How to Recognise Hazards and Know When to Click When Does a Potential Hazard Become a Developing Hazard?
Let’s stay with our pedestrian.
They’re walking along the pavement and initially there is nothing to suggest they’re going to enter the road, so you monitor them while continuing to drive normally.
Then something changes.
Perhaps they turn their head and look over their shoulder towards the traffic, maybe their body starts turning towards the road, or their direction of travel begins to change.
Now you have new information.
They’re no longer simply somebody who could cross the road; their behaviour is beginning to tell you that they may actually be about to do it.
That’s the transition you’re looking for.
Potential hazard: It could happen.
Developing hazard: There is now evidence that it is starting to happen.
This is one of the most important distinctions you can learn for ADI Part 1 hazard perception.
ADI Part 1 Hazard Perception Advice: How to Recognise Hazards and Know When to Click Don’t Wait Until the Hazard Has Already Happened
The opposite mistake is waiting for absolute confirmation.
Some candidates don’t click when the pedestrian looks towards the road or starts changing direction, they wait until the pedestrian actually steps into the carriageway.
By then you’ve missed the point of hazard perception.
If you were really driving, you wouldn’t ideally wait for somebody to walk directly in front of your car before deciding that something needed your attention; you’d recognise the clues beforehand and prepare to respond.
That’s why the word developing is so important.
You’re looking for the point where the situation begins to change and starts requiring a response from you, not the point where everything has already gone wrong.
ADI Part 1 Hazard Perception Advice: How to Recognise Hazards and Know When to Click is a key component of safe driving.
In summary, ADI Part 1 Hazard Perception Advice: How to Recognise Hazards and Know When to Click is a vital skill for all drivers.
ADI Part 1 Hazard Perception Advice: How to Recognise Hazards and Know When to Click The Three-Click Method for ADI Part 1 Hazard Perception
The technique we teach is the three-click method.
When you recognise that a potential hazard is becoming a developing hazard, use:
Click, click, click.
The important thing to understand is that this isn’t a secret trick for beating the hazard perception test, nor is it an excuse to click randomly throughout a clip.
There’s a practical reason behind it.
We don’t know precisely where the DVSA scoring window starts on an individual hazard. You can recognise what’s going to happen correctly but make your first click slightly before the scoring window has opened.
That means your judgement can be right while your timing doesn’t necessarily score what you expected.
Using three clicks around the point where you’ve genuinely recognised a developing hazard gives you a better opportunity to register within the scoring window.
The scoring system awards the highest value achieved; you’re not adding the points from all three clicks together.
I Spotted the Hazard Correctly and Still Scored Zero
I know how frustrating clicking too early can be because I’ve done it myself.
Understanding ADI Part 1 Hazard Perception Advice: How to Recognise Hazards and Know When to Click enhances your driving experience.
With practice, ADI Part 1 Hazard Perception Advice: How to Recognise Hazards and Know When to Click becomes second nature.
When I was practicing hazard perception, I remember watching a clip where there was a very long lorry waiting to emerge from a side road towards me.
I looked at the lorry and immediately thought, he’s going to come onto my side of the road.
Incorporate ADI Part 1 Hazard Perception Advice: How to Recognise Hazards and Know When to Click into driving lessons for comprehensive learning.
Ultimately, ADI Part 1 Hazard Perception Advice: How to Recognise Hazards and Know When to Click saves lives.
Driving with ADI Part 1 Hazard Perception Advice: How to Recognise Hazards and Know When to Click will benefit all road users.
Because of the length of the vehicle and the way it was positioned, my driving experience told me exactly what was going to happen, so I clicked.
The lorry then did exactly what I thought it was going to do.
My judgement was 100% correct.
My score for that click?
Zero.
I’d simply recognised what was going to happen before the scoring window had started.
That’s a really important lesson for experienced drivers preparing for ADI Part 1 because sometimes your experience means you anticipate something very early; you’ve read the situation correctly, but that doesn’t necessarily mean you’ve clicked within the scoring window.
It’s one of the reasons we use the three-click method.
Don’t Turn the Three-Click Method Into Random Clicking
There’s an important difference between clicking three times when you’ve recognised a developing hazard and repeatedly clicking because you’re frightened of missing something.
We’ve worked with trainees who had failed ADI Part 1 hazard perception several times and one of their biggest problems was simply clicking too often.
Somebody walking along the pavement?
Click.
Somebody standing in a garden?
Click.
A vehicle somewhere in the scene?
Click.
They were treating almost everything they could see as a developing hazard.
That’s when we brought it back to the simplest possible question:
Would you brake or swerve because of that person right now?
If the answer is no, don’t click simply because you’ve noticed them.
Watch them, anticipate what they might do and ask yourself what could happen next.
Then, when their behaviour changes and your answer becomes, yes, I would now need to respond, you’ve recognised the developing hazard.
Click, click, click.
We’ve had trainees change their whole approach after understanding this distinction and pass on their next attempt.
Don’t Learn Hazard Perception by Memorising Mock Clips
Practice clips are useful, but there’s a danger in doing the same hazard perception clips repeatedly.
Eventually you aren’t necessarily practising hazard perception anymore; you’re practising your memory.
You’ve seen the clip before, you remember the pedestrian is going to cross, you know the car is going to pull out or you remember the cyclist is about to change direction.
Real driving doesn’t work like that.
There’s another issue that candidates should understand about online hazard perception practice.
The scoring windows shown by practice websites, including our own at DriverTrainingTheory.co.uk, can only be an informed approximation. The DVSA doesn’t release the exact scoring information that would allow independent training providers to reproduce every scoring window precisely, so we have to make the best judgement we can based on what we’re seeing in the clips and our experience as driving instructors.
That’s another reason I wouldn’t become obsessed with repeatedly practising the same clips until you know exactly when to click.
Learn the skill, not the clip.
Practise Hazard Perception in the Real World
Some of the best hazard perception training doesn’t involve sitting in front of a computer at all.
You can practise whenever you’re travelling on the road.
If you’re learning to drive, hazard perception should already form part of your driving lessons; if you’re not currently able to drive, practise as a passenger.
Keep asking yourself:
- What if that pedestrian decides to cross?
- What if that person approaching the pedestrian crossing carries on towards it?
- What if that bus at the stop suddenly pulls away?
- What if that vehicle waiting at the junction emerges?
- What if that cyclist changes direction?
- What if somebody appears from behind that parked vehicle?
The words “What if?” are incredibly useful.
You’re not saying that every one of those things is currently a developing hazard, you’re training yourself to scan ahead and anticipate possibilities.
Then watch for the clue that changes the situation.
The pedestrian looks towards the road.
The bus indicates.
The vehicle starts creeping forwards.
The cyclist looks over their shoulder.
That’s when your potential hazard may begin developing into something requiring action.
Hazard Perception Is About Reading the Road
This is why I don’t believe there’s a secret trick to passing ADI Part 1 hazard perception.
The three-click method isn’t a trick; it’s simply a technique we use because we don’t know precisely where the scoring window begins, and an experienced driver can sometimes identify what’s about to happen before that window has started.
The real skill is reading the road properly.
You need to recognise potential hazards, monitor them and identify the moment something changes.
That might be movement, body language, positioning, a signal or simply the way a situation is unfolding.
You’re constantly asking:
What could happen next?
Then:
Has something now changed that means I may need to alter my speed or direction?
That’s hazard perception.
Don’t Switch Off After Finding One Hazard
Another important piece of advice for the ADI Part 1 hazard perception test is to stay alert throughout every clip.
One of the clips contains two developing hazards, so don’t assume that because you’ve identified one hazard your job is finished.
You may spot the first developing hazard, click correctly and then mentally relax, only for another hazard to develop moments later.
Keep scanning until the clip finishes.
The same principle applies to real driving, of course. Dealing with one hazard doesn’t magically make everything else around you safe.
Had a Bad Clip? Forget About It
ADI Part 1 Hazard Perception Advice: How to Recognise Hazards and Know When to Click is essential for every aspiring instructor.
One of the worst things you can do during the hazard perception test is start analysing the clip you’ve just completed.
You might think:
“I clicked too early.”
“I’ve missed that.”
“I bet I’ve scored zero.”
Forget it.
You genuinely don’t know your score until the end.
If you’re sitting there worrying about the previous clip, there’s a very good chance you’ll miss something in the next two or three because you’re no longer concentrating on what’s happening in front of you.
Stay calm, stay alert and treat every new clip as a fresh start.
Whatever happened in the previous one has happened.
Your attention needs to be on this one.
Don’t Just Aim to Scrape Through ADI Part 1
I don’t want trainees simply learning enough hazard perception to scrape through Part 1.
You should want to become as good at it as possible because the skill doesn’t disappear once you’ve passed the theory test.
Everything you’re learning here follows you into ADI Part 2.
On Part 2, you’re demonstrating your own driving ability. If a pedestrian looks over their shoulder, begins moving towards the road and you’re too late recognising what’s happening, that isn’t simply a lost point on a computer screen anymore; it could affect your driving assessment and, more importantly, the safety of the situation.
Then we get to ADI Part 3, where hazard perception becomes even more important.
ADI Part 1 Hazard Perception Helps Prepare You for Part 3
When you’re teaching somebody to drive, you need to be looking ahead and recognising situations early enough to help your pupil deal with them.
You want your pupil looking where you’re looking.
You want them looking when you’re looking.
And ultimately, you want them understanding why you’re looking there.
If you can see a potential problem developing well ahead, you have time to help your pupil recognise it and make an appropriate decision.
If you’re only recognising hazards when they’re directly in front of the car, how are you going to teach somebody else to anticipate them?
That’s why I see ADI Part 1 hazard perception as much more than another hurdle you have to clear before moving on to Part 2.
It’s part of learning to think like a driving instructor.
My Best ADI Part 1 Hazard Perception Advice
If you’re struggling with ADI Part 1 hazard perception, bring everything back to three simple principles.
First, understand the difference between a potential hazard and a developing hazard.
Something that could happen deserves your attention, but that doesn’t necessarily mean it’s time to click.
Second, when you recognise that the situation is genuinely developing, use the three-click method to help cover the uncertainty surrounding exactly where the scoring window begins.
Third, and probably most importantly, imagine that you’re actually driving the car and ask yourself:
Would I hit the brakes or would I swerve because of what is happening right now?
If the answer is no, keep watching.
If the answer becomes yes because the situation has started developing:
Click, click, click.
Then stay alert, because there might still be another developing hazard in that clip.
Get those principles right and you’re doing far more than learning how to pass ADI Part 1 hazard perception; you’re developing the observation, anticipation and forward-planning skills you’ll need for Part 2, Part 3 and eventually when you’re sitting beside your own pupils teaching them how to recognise hazards for themselves.
Practicing ADI Part 1 Hazard Perception Advice: How to Recognise Hazards and Know When to Click can lead to better driving habits.
Probably not.
For effective learning, incorporate ADI Part 1 Hazard Perception Advice: How to Recognise Hazards and Know When to Click into your study plan.
Continued use of ADI Part 1 Hazard Perception Advice: How to Recognise Hazards and Know When to Click makes you a proactive driver.
Stay vigilant and apply ADI Part 1 Hazard Perception Advice: How to Recognise Hazards and Know When to Click in real scenarios.
When practicing, recall ADI Part 1 Hazard Perception Advice: How to Recognise Hazards and Know When to Click frequently.
Incorporate ADI Part 1 Hazard Perception Advice: How to Recognise Hazards and Know When to Click into your driving mindset.
Every new driver should appreciate ADI Part 1 Hazard Perception Advice: How to Recognise Hazards and Know When to Click for seamless learning.
Emphasizing ADI Part 1 Hazard Perception Advice: How to Recognise Hazards and Know When to Click will bolster your confidence.
Use ADI Part 1 Hazard Perception Advice: How to Recognise Hazards and Know When to Click to connect with other drivers.
By focusing on ADI Part 1 Hazard Perception Advice: How to Recognise Hazards and Know When to Click, you become a more informed driver.
Teaching others about ADI Part 1 Hazard Perception Advice: How to Recognise Hazards and Know When to Click reinforces your own knowledge.
Make ADI Part 1 Hazard Perception Advice: How to Recognise Hazards and Know When to Click part of your routine.