Blue & White vs Red & White Countdown Markers
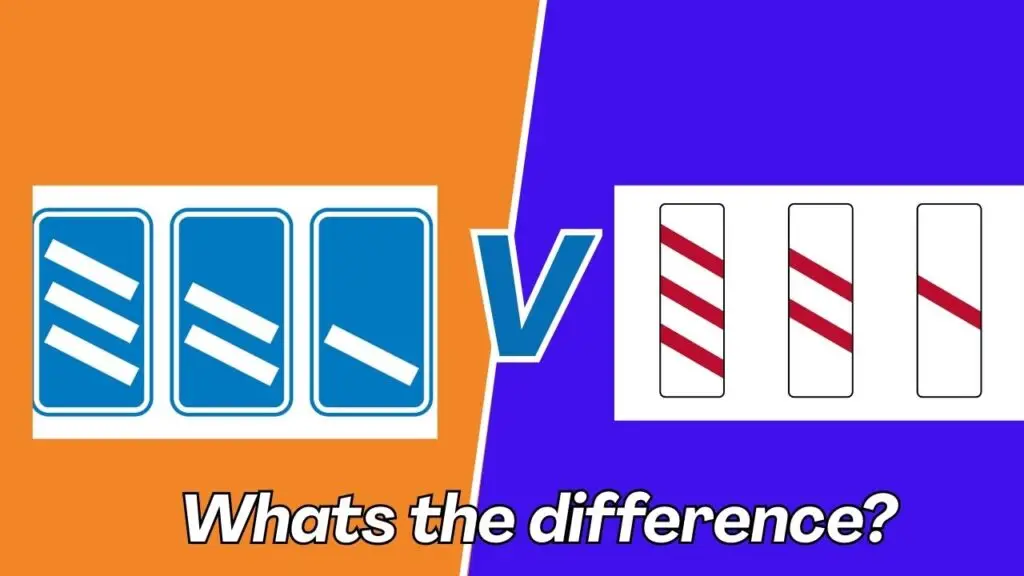
Some of the easiest-to-miss signs on Britain’s roads are the little countdown markers. They’re simple boards with diagonal bars, counting down three… two… one. But the colour is crucial — because a blue set and a red set mean two very different things.
When discussing Blue & White vs Red & White Countdown Markers, it’s important to understand their significance in road safety.
This brings us to a crucial distinction: the Blue & White vs Red & White Countdown Markers serve different purposes for drivers.
Understanding these countdown markers is essential for safe driving, especially for new drivers and those preparing for their driving tests. The significance of these markers extends beyond mere aesthetics; they provide crucial information about road conditions and upcoming manoeuvres, helping drivers make informed decisions. For instance, when you see the blue and white markers, it signifies that you should start preparing to exit the motorway. This preparation is not just about changing lanes; it involves checking your mirrors, signalling your intention, and ensuring that the path is clear for a safe departure. Moreover, it’s important to note that these markers are strategically placed at intervals to give you ample warning and time to react accordingly.
This is one of those Highway Code details the DVSA love to test learners on, so let’s make it crystal clear.
These Blue & White vs Red & White Countdown Markers are crucial for navigating safely.
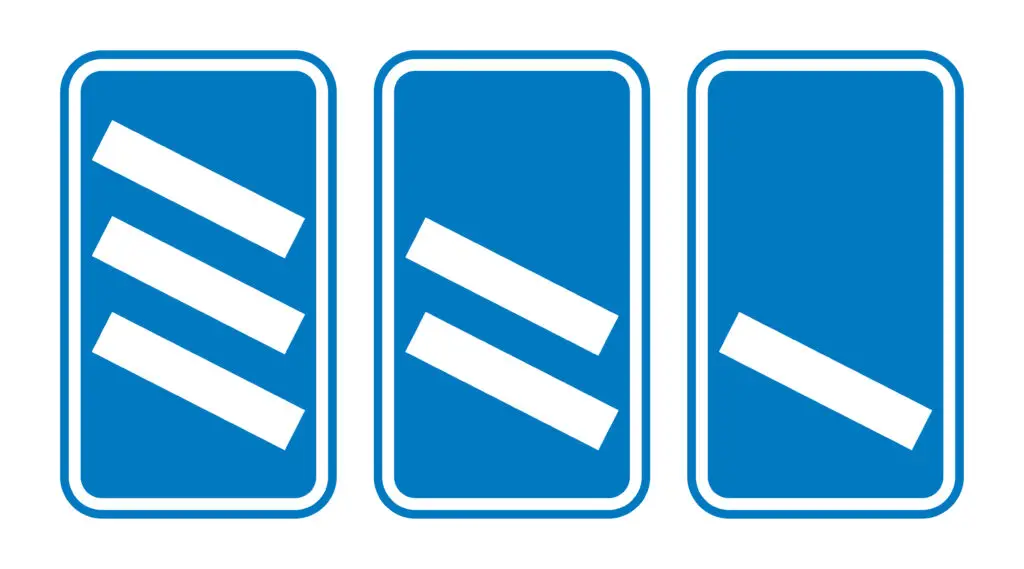
🔵 Blue & White Countdown Markers – Motorway Exit Ahead
- What they look like: A blue rectangle with white diagonal bars. You’ll see them in sets of three, two, then one.
Furthermore, understanding the Blue & White vs Red & White Countdown Markers is vital for both new and experienced drivers.
Moreover, the usefulness of the blue and white countdown markers is further emphasised when considering how often they are encountered. Motorways make up a significant portion of the UK road network, and as such, these markers are critical in guiding drivers safely off the motorway. Understanding their significance can help instil confidence in new drivers, easing their transition into more complex driving environments. Regular exposure to these signs during driving practice can reinforce their importance and prepare learners for real-world driving scenarios.
- What they mean: You are approaching the start of a motorway exit slip road (or sometimes a service area).
- Distances:
- 3 bars = about 300 yards from the start of the slip road.
- 2 bars = about 200 yards.
- 1 bar = about 100 yards.
These signs are there to give you time to check mirrors, signal, and move safely into the left lane if you intend to leave the motorway.
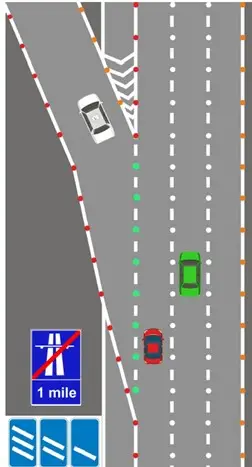
Memory tip: Blue = motorway guidance. They’re helping you prepare for something you can do — taking an exit.
Red & White Countdown Markers – Level Crossing Ahead
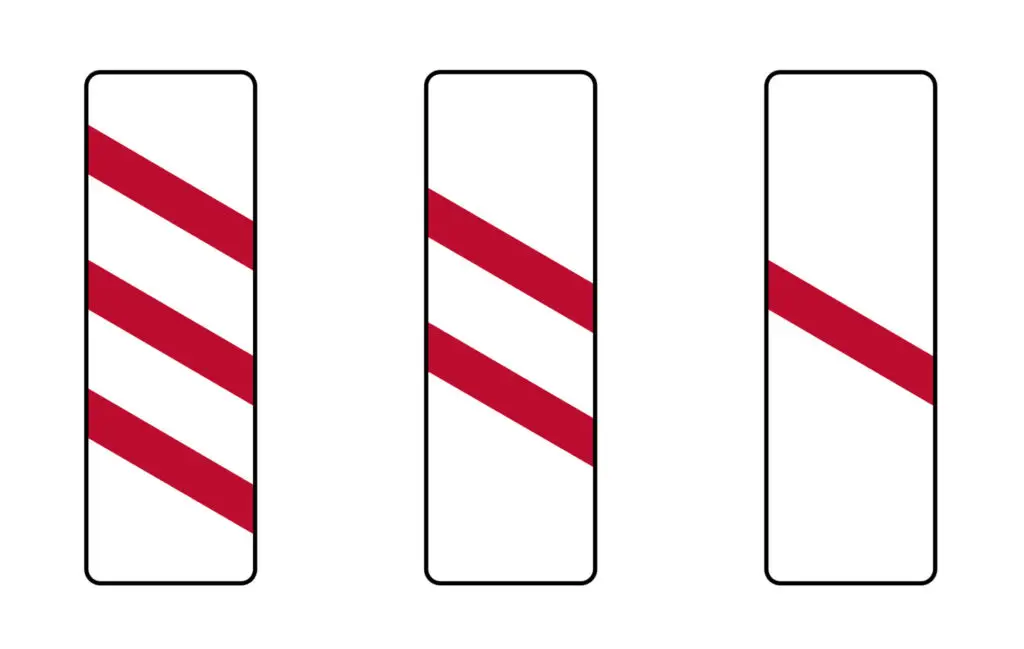
- What they look like: A white rectangle with red diagonal bars. Again, they appear in sets of three, two, then one.
- What they mean: You are approaching a level crossing, usually where the crossing might be hard to spot.
In addition to the visual cues provided by the countdown markers, understanding the context of their usage can enhance your driving skills further. For example, when approaching a slip road, it’s common for drivers to experience a moment of anxiety as they prepare to transition onto a different road. The countdown markers are designed to alleviate this by offering a clear visual indication of how far away the exit is. This can be particularly beneficial in high-speed scenarios, such as motorways, where decisions need to be made swiftly and accurately. By paying attention to these markers, you’re not just complying with road rules; you’re also engaging in proactive driving that prioritises your safety and that of others on the road.
In addition, let’s explore the Blue & White vs Red & White Countdown Markers in more detail.

- Distances: The bars divide the distance between the advance warning sign and the stop line into three equal parts. Unlike the motorway signs, this doesn’t always equal exactly 100 yards per board.
These are a vital warning to reduce speed and prepare to stop if the crossing barriers are down or signals flash.
The blue and white countdown markers serve not only as indicators of impending exits but also as reminders of the rules governing motorway driving. For instance, the speed limit on motorways is typically higher than on other roads, and the need to decisively switch lanes means attentiveness is paramount. Failing to respond to these countdown markers can lead to dangerous situations, such as last-minute lane changes or abrupt braking, which can increase the risk of collisions. Therefore, recognising and responding to these signs is an integral part of motorway driving etiquette.
Knowing the difference between Blue & White vs Red & White Countdown Markers can enhance safety.
Memory tip: Red = railway risk. They’re alerting you to something you must prepare for — the possibility of stopping at a crossing.
Key Difference
- Blue & White = Motorway exit slip road countdown.
- Red & White = Level crossing countdown.
Red and white countdown markers are often placed strategically in advance of level crossings to ensure that drivers can react in time. In some cases, these markers can alert drivers to crossings that may not be immediately visible due to the surrounding landscape or infrastructure. This proactive warning system underscores the importance of speed reduction and readiness to stop. By heeding these warnings, drivers can ensure not only their safety but also the safety of pedestrians and railway users.
In practical terms, this means that when you see the red and white markers, you should begin to assess your surroundings for any potential hazards. This could involve looking for signal lights, listening for train horns, or watching for other vehicles that may also be preparing to stop. In this way, the red and white countdown markers serve as a multi-sensory alert system, encouraging drivers to engage more fully with their driving environment.
One guides you calmly off the motorway, the other warns you of a serious hazard ahead.
The Blue & White vs Red & White Countdown Markers are critical for highway safety.
Blue & White vs Red & White Countdown Markers Final Thought
The distinctions between Blue & White vs Red & White Countdown Markers are important to grasp.
Paying attention to Blue & White vs Red & White Countdown Markers is a key component of safe driving.
Remember, the Blue & White vs Red & White Countdown Markers provide essential guidance on the roads.
In summary, the Blue & White vs Red & White Countdown Markers serve distinct functions that every driver must understand.
On the other hand, the red and white countdown markers are equally significant, serving as crucial alerts for potential hazards, especially at level crossings. These markers remind drivers to remain vigilant and prepared to stop, particularly in areas where visibility may be obstructed. It’s common for drivers to overlook the importance of these markers until they experience a close call at a crossing. Understanding that red markers signify a need to reduce speed and prepare to halt can prevent accidents and save lives.
The Blue & White vs Red & White Countdown Markers play a vital role in ensuring driver awareness.
Engaging with the Blue & White vs Red & White Countdown Markers can save lives.
The knowledge of Blue & White vs Red & White Countdown Markers is invaluable for every driver.
In essence, the Blue & White vs Red & White Countdown Markers enhance your understanding of road safety.
Grasping the concept of Blue & White vs Red & White Countdown Markers is fundamental.
Keep the Blue & White vs Red & White Countdown Markers in mind as you drive.
Finally, the Blue & White vs Red & White Countdown Markers are your guide on the road.
Awareness of the Blue & White vs Red & White Countdown Markers is crucial for safe navigation.
Understanding the Blue & White vs Red & White Countdown Markers can make a difference.
In conclusion, the distinction between the Blue & White vs Red & White Countdown Markers is not merely academic; it’s a matter of road safety. As a driver, you must recognise and respect these signs, as they are designed to enhance your driving experience while keeping you and others safe. Remember, blue markers signify: “Get ready to leave”, while red markers indicate: “Get ready to stop.” By internalising these messages, you’ll ensure your driving is as safe and informed as possible, allowing you to navigate the roads with confidence and clarity.
- On the motorway, blue markers mean: “Get ready to leave.”
- On approach to a level crossing, red markers mean: “Get ready to stop.”
Simple, sharp, and life-saving. Get this detail right in your head now, and you won’t be caught out in the theory test — or worse, on the road.
BACK TO CONFUSING ROAD SIGNSSignals by authorised persons – School crossing patrolsMaster the Theory test by using our flashcards
Ultimately, the knowledge of how to interpret these countdown markers can play a pivotal role in your driving experience. Whether you’re navigating the fast-paced environment of a motorway or approaching the potential hazards of a level crossing, being aware of what these signs represent can significantly improve your reaction time and decision-making skills. By integrating this understanding into your driving habits, you enhance your proficiency and confidence behind the wheel.
Ultimately, the Blue & White vs Red & White Countdown Markers are more than mere signs; they guide your journey.
Thus, recognising the Blue & White vs Red & White Countdown Markers is essential for every driver.