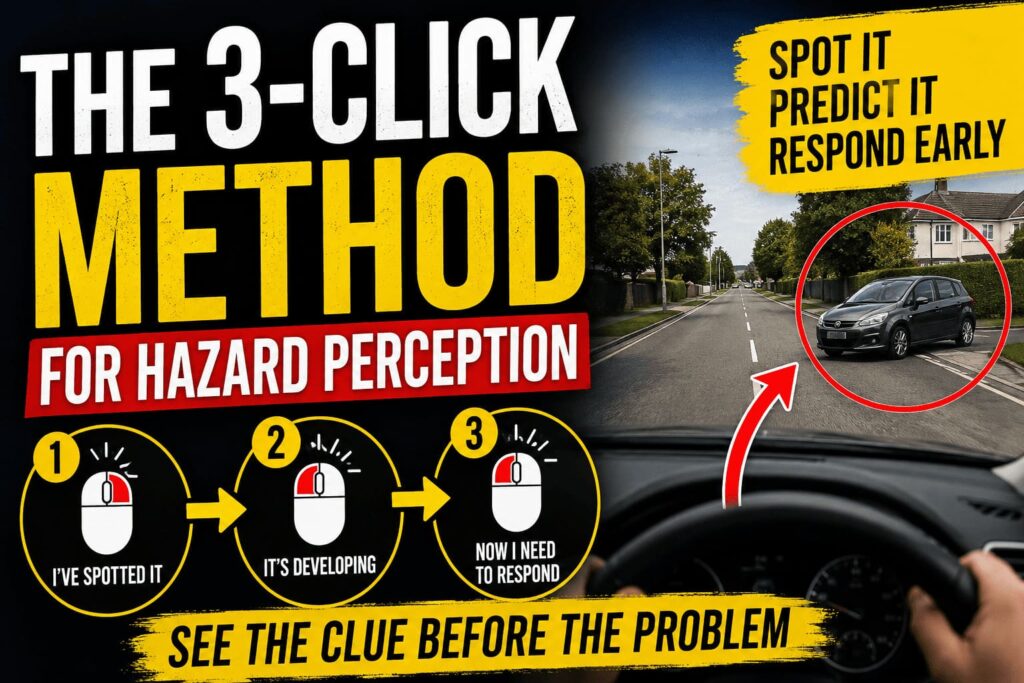
What Is the 3-Click Method for Hazard Perception?
If you are preparing for the ADI Part 1 theory test, or even the standard learner theory test, you may have heard people talking about the 3-click method for hazard perception.
The idea is simple. Instead of trying to make one perfectly timed click when you see a developing hazard, you use a small number of deliberate clicks as the hazard develops.
Typically, that means clicking when you first believe the hazard has started to develop, then clicking again shortly afterwards as the situation becomes clearer, and possibly once more as the hazard develops further.
Incorporate What Is the 3-Click Method for Hazard Perception? into your daily driving habits.
But there is an important warning.
The 3-click method shouldn’t become a game of clicking three times whenever anything moves. You still need to understand what a developing hazard actually is.
What Is a Developing Hazard?
Before worrying about how many times to click, get this bit right. A developing hazard is something that is beginning to make you change your speed or direction, or is likely to require you to take action.
Imagine you are driving along and see a pedestrian walking along the pavement.
At that point, they are something you should be aware of, but they may not yet be a developing hazard.
Now imagine that pedestrian starts looking towards the road and moving towards the kerb.
The situation is changing. Then they step towards or into the road.
Now the hazard has clearly developed and you are likely to need to slow down, stop or alter your course.
That’s what hazard perception is really testing: can you recognise when an ordinary situation starts turning into something that requires a driver’s response?
How Does the 3-Click Method Work?
The principle is straightforward.
When you identify what you genuinely believe is a developing hazard:
- Make your first click as you recognise that the situation is developing.
- Make another deliberate click shortly afterwards as the hazard becomes clearer.
- If appropriate, make a third click as the situation continues to develop.
These should be separate, considered clicks, not three frantic clicks together.
Think of it as following the development of the hazard rather than trying to hit one magic moment.
For example, imagine a child is standing on the pavement next to a parked car.
You don’t automatically need to click simply because you’ve seen a child.
But then the child starts moving towards the road.
Click.
The child reaches the edge of the pavement and continues towards the carriageway.
Click.
The child steps into the road and you clearly need to respond.
Click.
You’ve followed the development of the situation.
Why Do People Use Three Clicks?
Because hazard perception scoring involves timing.
The earlier you correctly identify a developing hazard within the scoring window, the more points you can potentially score.
The difficulty is that you can’t see that scoring window.
This creates a common problem.
You see what is going to happen very early, click because you’ve recognised it, and potentially click before the scoring opportunity you were trying to identify has properly developed.
I’ve seen this particularly with people who are already experienced drivers or who become very good at hazard perception practice. They can sometimes anticipate what is going to happen before the clip considers the situation to have developed sufficiently.
Using another carefully timed click can give you some protection against clicking slightly too early.
The 3-Click Method Is Not About Clicking Three Times Quickly
This is where people can misunderstand the technique.
It isn’t:
Click-click-click.
That achieves very little.
If the clicks are virtually on top of one another, you haven’t really covered different stages of the developing situation.
There needs to be a sensible gap between your clicks.
You’re effectively saying: “I’ve spotted something.” Then: “Yes, this is developing.” And potentially: “Now it definitely requires a response.” That is very different from simply hammering the mouse button three times.
An Example of the 3-Click Hazard Perception Method
Imagine you’re travelling along a residential road. Ahead, there is a car waiting at a side road. Initially, it is stationary.
You should notice it, but a stationary vehicle waiting correctly at a junction isn’t automatically a developing hazard. Then you notice the vehicle starting to creep forward. That should get your attention.
You might make your first click.
It continues moving towards your path.
You make your second click.
The vehicle pulls out and you would now clearly need to reduce your speed.
You make your third click.
Notice what’s happening.
You’re not randomly clicking at the car.
You’re recognising the stages through which the hazard develops.
That is a much better way of understanding the technique.
Don’t Become Obsessed With Counting Clicks
This is something I think gets lost in a lot of hazard perception advice.
People become so focused on:
“Have I clicked three times?”
that they stop concentrating on what is happening on the road.
That is completely the wrong way around.
Hazard perception should be teaching you to read the road ahead.
When I’m teaching someone to drive, I don’t want them thinking about clicking a mouse. I want them noticing clues.
For example:
- A pedestrian looking towards the road
- A vehicle edging out of a junction
- Brake lights appearing ahead
- A cyclist changing position
- A bus indicating to move away
- A parked vehicle with someone sitting inside
- A ball appearing in the road
- A vehicle approaching quickly from a side road
- A pedestrian partially hidden behind a parked vehicle
These are clues.
Good hazard perception comes from recognising the clues and predicting what could happen next.
Don’t Click at Every Possible Hazard
There is also a difference between a potential hazard and a developing hazard.
A parked car is a potential hazard.
A parked car whose door begins opening is developing into a hazard.
A pedestrian walking along a pavement is something to monitor.
A pedestrian suddenly turning towards a zebra crossing may be developing into a hazard.
A vehicle waiting at a junction is something you should notice.
A vehicle beginning to emerge into your path is a developing hazard.
Understanding that distinction will improve your hazard perception far more than simply memorising a clicking technique.
Can You Be Penalised for Clicking Too Much?
Yes, which is why I don’t recommend turning the 3-click method into random clicking.
The hazard perception test is designed to recognise inappropriate patterns of clicking. If you simply click continuously or try to beat the system with repetitive clicking patterns, you risk scoring nothing for that clip.
That’s another reason I prefer to teach the method around hazard development rather than simply saying, “Click three times.”
Every click should have a reason behind it.
What If There Is More Than One Hazard?
Don’t assume that once you’ve dealt with one developing hazard, the clip is finished.
Keep watching.
The test is assessing your ability to continuously scan the driving environment.
Something happening on the left doesn’t mean you should stop watching the right.
A pedestrian may distract you from a vehicle emerging from a junction. A cyclist may draw your attention away from brake lights appearing further ahead.
Keep scanning:
Near, middle distance and far distance.
And keep asking yourself:
What’s happening?
What could happen next?
Would it make me change speed or direction?
That last question is particularly useful.
Why ADI Part 1 Candidates Need More Than a Clicking Technique
For someone preparing to become a driving instructor, hazard perception has a much bigger purpose.
You’re not simply trying to pass ADI Part 1.
Eventually, you’re going to have somebody sitting next to you who may not see the hazard at all.
You need to understand why you spotted it.
What clues were available?
When did the situation start developing?
What should the driver have noticed?
What action should they have taken?
And later, when you’re preparing for ADI Part 3, you’ll need to help pupils develop these skills themselves.
This is why I’ve always believed that good ADI Part 1 training should build knowledge that you can carry forward into Parts 2 and 3 rather than simply teaching you how to pass a computer-based test.
Practise Hazard Perception With Real Driving Situations
One of the reasons we use real-life hazard perception clips in our training is that hazards on real roads aren’t always as obvious as they appear in practice material.
Real roads are messy.
There may be pedestrians, cyclists, parked cars, junctions, road signs and oncoming vehicles all competing for your attention.
That’s much closer to what actually happens when you’re driving and, eventually, when you’re teaching someone else to drive.
When practising, don’t just ask:
“When should I click?”
Ask:
“What was the first clue?”
That question develops your understanding.
Learn to Predict the Hazard
The strongest hazard perception candidates aren’t simply reacting to things.
They’re predicting them.
You see a football near the road.
Where might the child be?
You see a delivery van stopped with its hazard warning lights on.
Could the driver step out?
You see a cyclist ahead approaching a parked vehicle.
Might they move towards the centre of the road?
You see a bus at a bus stop.
Could it indicate and move away?
This is the skill that eventually transfers into real driving.
You’re looking for the clue before the problem.
My Advice on the 3-Click Method
I think the 3-click method can be useful, particularly for candidates who are recognising hazards correctly but struggling with the timing of their clicks.
But don’t treat it as a trick for passing hazard perception.
Use it as a way of following a hazard as it develops.
Your thought process should be something like:
I’ve noticed it.
It’s developing.
Now I would need to respond.
And your clicks should reflect that development.
More importantly, practise identifying why something became a developing hazard.
If you understand that, the clicking becomes the easy part.
Is the 3-Click Method Suitable for ADI Part 1?
Yes, it can be useful for ADI Part 1 hazard perception, but remember that the standard expected of somebody becoming a driving instructor should go beyond learning a clicking strategy.
ADI Part 1 is the foundation of what comes afterwards.
The knowledge and observation skills you’re developing now will eventually help you recognise problems in your pupils’ driving.
That’s why I would rather see somebody genuinely understand hazard perception than simply learn how to get through the test.
The Biggest Mistake With Hazard Perception
One of the biggest mistakes is treating hazard perception as a separate subject that only exists to pass the theory test.
It doesn’t.
You’re learning one of the most important driving skills there is.
Good drivers constantly ask themselves:
What’s happening next?
The best drivers often recognise a problem before it becomes an emergency.
And as a future driving instructor, that’s ultimately what you’ll be trying to teach your pupils.
Final Thoughts on the 3-Click Hazard Perception Method
The 3-click method is a simple technique designed to reduce the chance of missing the scoring opportunity because your first click was slightly too early.
The important points are:
- Spot the developing hazard rather than simply clicking at everything.
- Make deliberate clicks as the situation develops.
- Don’t make three rapid clicks together.
- Don’t click continuously or create repetitive patterns.
- Keep scanning after the first hazard.
- Learn to recognise the clues that tell you something is about to happen.
- Concentrate on understanding hazards, not just passing the test.
Used properly, the 3-click method can help with your hazard perception timing.
But the real goal is bigger than that.
See the clue. Predict the problem. Recognise when it develops. Respond early.
Get that right and you’re not simply learning how to pass hazard perception. You’re developing a skill that you’ll use throughout your driving career and, if you’re training to become an ADI, one that you’ll eventually need to teach to somebody else.
Understanding What Is the 3-Click Method for Hazard Perception? is essential for mastering the test.
Many people ask, What Is the 3-Click Method for Hazard Perception? and how does it work?
The 3-click method for hazard perception is a proven technique to enhance your driving safety.
By practicing What Is the 3-Click Method for Hazard Perception?, you are preparing yourself for real-world driving situations.
Understanding What Is the 3-Click Method for Hazard Perception? can significantly improve your performance on the test.
Before using the technique, ask yourself, What Is the 3-Click Method for Hazard Perception? and how can it help you?
Mastering What Is the 3-Click Method for Hazard Perception? involves practice and patience.
When preparing for the driving theory test, knowing What Is the 3-Click Method for Hazard Perception? is crucial.
The 3-click method for hazard perception is more than a technique; it’s a skill that enhances safety.
As you practice, constantly think about What Is the 3-Click Method for Hazard Perception? and how it applies to your driving.
In various situations, consider What Is the 3-Click Method for Hazard Perception? and when to respond.
Ultimately, the answer to What Is the 3-Click Method for Hazard Perception? lies in recognizing hazards early.
Frequently Asked Questions About the 3-Click Hazard Perception Method
What is the 3-click method for hazard perception?
The 3-click method involves making a small number of deliberate clicks as you recognise a hazard developing. You might click when you first believe the situation is becoming a hazard, click again as it develops, and potentially a third time when it clearly requires a response. The aim is to reduce the chance of clicking slightly too early and missing the scoring window.
How quickly should I click three times on hazard perception?
Don’t simply click three times rapidly. The clicks should represent different stages of the developing hazard. Think of it as: I’ve spotted it – it’s developing – now I need to respond. The important skill is recognising how the situation is changing, rather than mechanically counting three clicks.
Can I lose marks for clicking too many times?
Yes. You should not click continuously or use an obvious repetitive clicking pattern in an attempt to beat the test. The system includes measures designed to detect inappropriate clicking. Only click when you have a genuine reason to believe a hazard is developing.
Should I click as soon as I see a potential hazard?
Not necessarily. There is an important difference between a potential hazard and a developing hazard. A pedestrian walking along the pavement may simply be something to monitor. If that pedestrian starts moving towards the road, the situation may now be developing into something that requires you to change speed or direction. Learning to recognise that change is the real skill being tested.
Does the 3-click method work for ADI Part 1 hazard perception?
It can be a useful technique for ADI Part 1 candidates, particularly if you are good at spotting hazards but sometimes click too early. However, future driving instructors should go beyond simply learning a clicking technique. Try to understand the clues that made you recognise the hazard because these observation and anticipation skills will eventually become part of what you teach your own pupils.
Understanding What Is the 3-Click Method for Hazard Perception? will elevate your driving experience.
Ultimately, What Is the 3-Click Method for Hazard Perception? can be your best ally in safe driving.
By asking What Is the 3-Click Method for Hazard Perception?, you engage in a valuable learning process.
Ultimately, What Is the 3-Click Method for Hazard Perception? is a critical part of safe driving education.
Learning What Is the 3-Click Method for Hazard Perception? is essential for effective hazard recognition.
Engaging with What Is the 3-Click Method for Hazard Perception? fosters better driving habits.
Every time you drive, think about What Is the 3-Click Method for Hazard Perception? to stay safe.
The question What Is the 3-Click Method for Hazard Perception? should constantly be on your mind.
As you reflect on your driving, remember What Is the 3-Click Method for Hazard Perception? and its importance.
Always strive to understand What Is the 3-Click Method for Hazard Perception? to enhance your skills.
Your journey to better driving includes exploring What Is the 3-Click Method for Hazard Perception?.
The skill of understanding What Is the 3-Click Method for Hazard Perception? is invaluable for any driver.
To gain confidence in your driving, learn What Is the 3-Click Method for Hazard Perception? in depth.
Many driving instructors emphasize What Is the 3-Click Method for Hazard Perception? for safe driving practices.
As you prepare for the test, remember What Is the 3-Click Method for Hazard Perception? is a valuable tool.
It can be a useful technique because one of the biggest problems with hazard perception isn’t always seeing the hazard. It is knowing exactly when the scoring window begins.
Consider incorporating What Is the 3-Click Method for Hazard Perception? into your study routine.
Taking the time to learn What Is the 3-Click Method for Hazard Perception? will pay off in your driving future.
Practicing What Is the 3-Click Method for Hazard Perception? helps ensure you’re prepared for real-world scenarios.
Ultimately, mastering What Is the 3-Click Method for Hazard Perception? leads to safer driving.
By practicing What Is the 3-Click Method for Hazard Perception?, you will enhance your hazard recognition skills.
Refining your understanding of What Is the 3-Click Method for Hazard Perception? is key to becoming a better driver.
In summary, knowing What Is the 3-Click Method for Hazard Perception? can significantly impact your test results.
Take the time to learn What Is the 3-Click Method for Hazard Perception? as you prepare.
Remember, What Is the 3-Click Method for Hazard Perception? is not just for the test, but a lifelong skill.
Finally, reflect on What Is the 3-Click Method for Hazard Perception? and how it can save lives on the road.
Every time you think about hazard perception, ask yourself What Is the 3-Click Method for Hazard Perception? and practice it.